Page 1 of 4
My first bull
Posted: Fri 5. Jun 2015, 21:07
by Roy Partin
I guess it was time for me to step out of my comfort zone. I started on my first bullwhip last night. I know I should be reading tutorials and asking questions along the way but I learn best by just doing it. From some reading in the past I remember that 1/4" music wire was good for a handle core. I also remember that you can never have enough binding. So far I've grinded down the end of the wire so a strand of 1/4" sinker cord will fit on nice and snug.

I then packed BBs followed by a short section of small lead shot into the sinker cord. Then a good bit of binding.
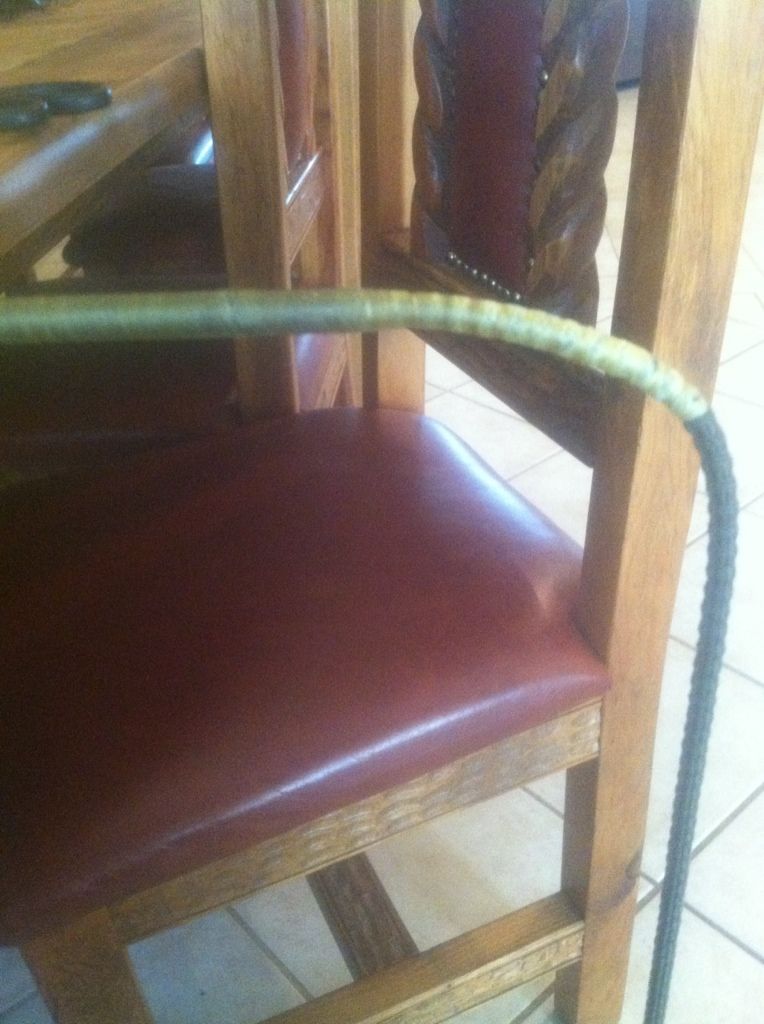
Lastly, I slid a piece of 3/8" sinker cord over the handle and part of the BB core with a lot more binding. I figured this would help to bolster and build taper.

So far I'm happy with the foundation. It seems like the transition is solid but I guess only time will tell. My plan was to go with a 10 plait belly and 14 plait overlay but I may have to step it up. This was my first real experience with a lot of binding and I must say that its a pain in the arse. I will keep experimenting along the way but I'm always open to suggestions.
Posted: Fri 5. Jun 2015, 21:26
by Guest
Yes yes yes, build threads are awesome

I really like the philosophy of just jumping into new things. That's the best way to learn, and figuring things out on your own lets you create your own style of doing things. There's no "right" and "wrong" ways after all.
You're right, binding is a pain in the arse. But it will also pay off in the end. Getting it gradual and tight enough are pretty much the only real tricks to it, the rest is just elbow grease. What you have there looks pretty convincing so far. I'm really looking forward to the results.
- Pokkis
Posted: Fri 5. Jun 2015, 21:33
by Jeff Roseborough
Got a great start there Roy! Yes binding can make a world of difference in a whip. I like to taper bindings also. I'll bind heavily near the transition and go out about a foot or so for the first layer. Each layer I will go a bit further out. It helps to create a stiff transition that gradually loosens up along the whip.
Posted: Fri 5. Jun 2015, 21:36
by Roy Partin
Thanks a bunch Pokkis and Jeff. I will pay close attention to the binding then. How far down the belly is typical for binding?
Posted: Fri 5. Jun 2015, 21:46
by Guest
How far? If ten whipmakers answer that, you'll get ten different answers. Personally I like to keep it short so that it ends within 8 inches or so from the end of the handle foundation. The one I'm working now has about 8 inches on the first belly and 10 on the second one and that's long for me. I understand that many do it longer than that, but it's pretty much a question of what works best for your prefered style and how tight you plait.
- Pokkis
Posted: Fri 5. Jun 2015, 21:53
by David Cross
I bind to 25% of the thong's finished length. If I'm working on a 6' bull, with a 12" handle, then that's 72-12=60 60/4=15. I then divide that measurement by the number of binding layers, which (for me) is always three. So I have my core binding at 5", first belly at 10", second belly at 15". Each binding is made up of three passes, so that 5" interval gets divided by three again. That's ~1.5" per pass.
Nine total passes of binding, gradually softening over 15". That's my method. I just posted a picture of the results in my Whip No. 36 thread if you want to see it. I'm by no means an expert; this is just what works for me.
And, Roy, I always thought you'd done bulls before! Congratulations for moving beyond what you know, and trying a new style. I wanted to try Cow and Pipe whips for a while, but I'm still zeroing in on what I want out of a whip. Hell, I may even try a Stock whip one day. But not today.
I will be watching this thread. I'm absolutely excited to see how it turns out.
Posted: Fri 5. Jun 2015, 22:05
by Roy Partin
That's a perfect answer Pokkis, everybody has their own technique. It seems like yours is working for you. I will have to figure my own eventually. David your technique sounds well thought out also. I will check out your build when I can. Many thanks to you both
Posted: Fri 5. Jun 2015, 23:30
by Rachel McCollough
That's a very good looking foundation, look forward to seeing how it comes along!
Posted: Sat 6. Jun 2015, 02:16
by Roy Partin
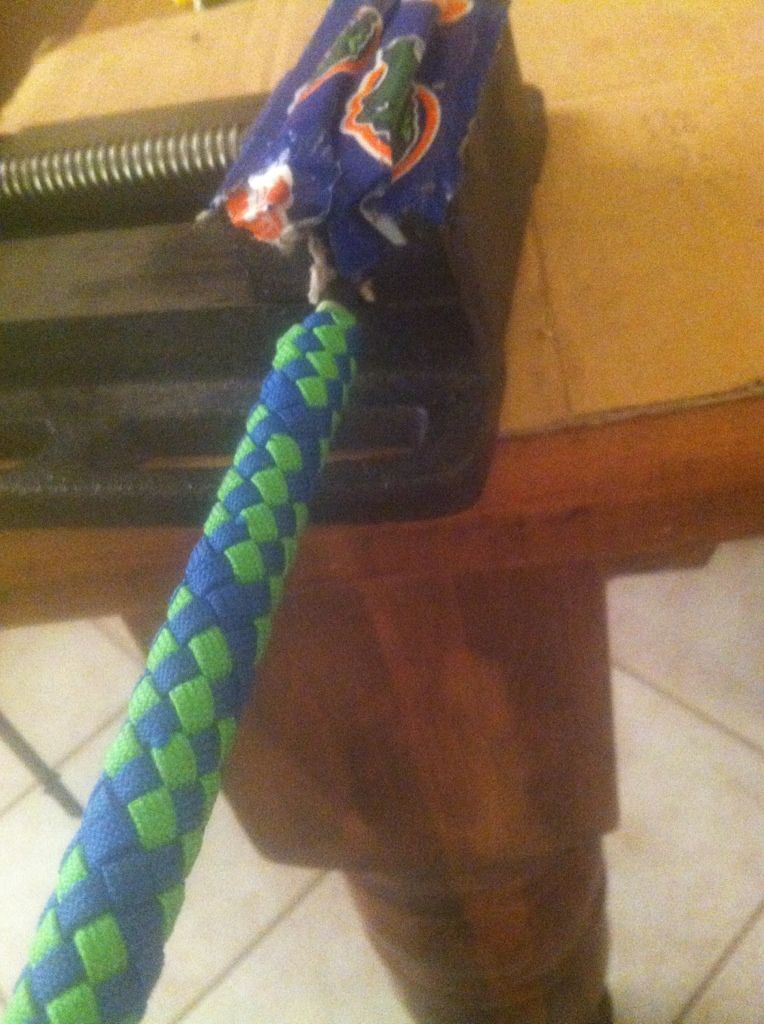
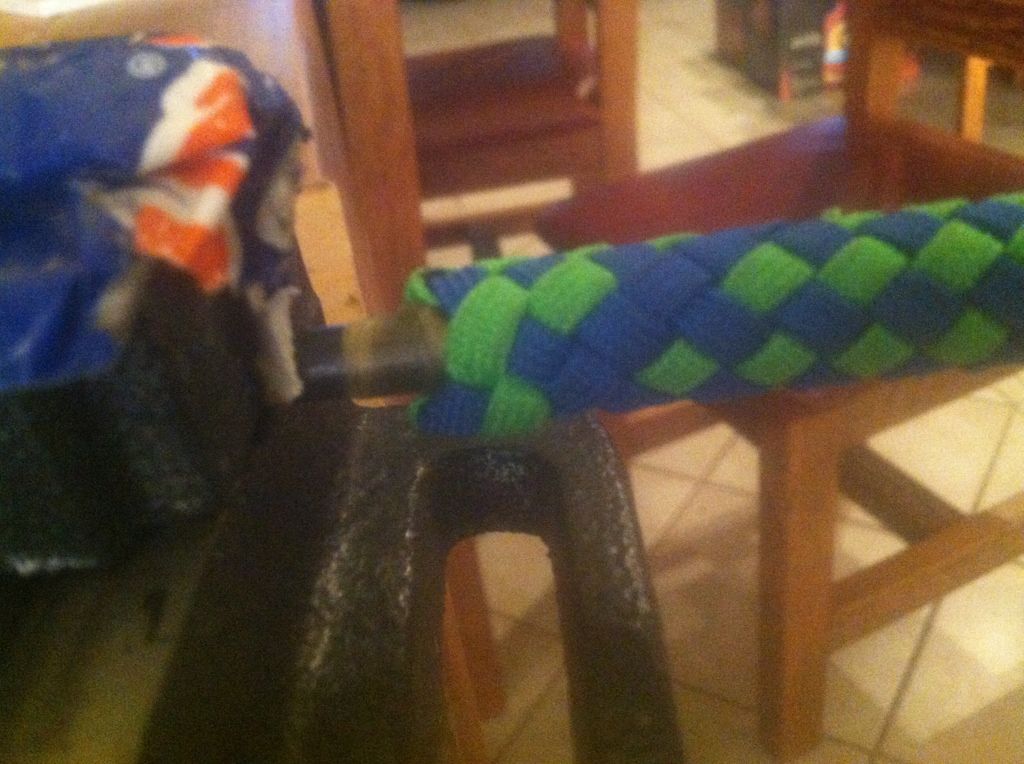
Thank you mam, I'm a little anxious myself. I started on the belly/handle. This was originally suppose to be rust colored but they changed their mind at the last minute. Now its bright green and blue. I watched David's Crown Start tutorial again and somehow managed this 10 plait start. It looked ackward at first but I went back with my fid and tightened it all up. It now appears to be ok.
Posted: Sat 6. Jun 2015, 02:32
by Rachel McCollough
Mighty fine looking, Roy!!! That is very nice. It looks tight, neat and clean! David's video has me wanting to try this out too. Y'all are turning out some really great work.
Posted: Sat 6. Jun 2015, 02:46
by David Cross
Gah! How could I not have thought of using an awl to straighten it up! Is there a smilie or emoticon for thumping my head against a wall?
Looks fantastic, Roy. I'll try the awl on my next one.
Posted: Sat 6. Jun 2015, 02:48
by Taylor Jennings
Glad to know I'm not the only one using my fid. Thought I might be somehow cheating, hadn't seen anyone mention it yet. Looks great Roy!
Posted: Sat 6. Jun 2015, 02:56
by David Cross
It technically is, but for something as finnicky as a Crown Start, I will gladly cheat my ass off. I want mine to look like THAT.
Posted: Sat 6. Jun 2015, 08:51
by Robert Gage
Roy, that's a terrific start on your bull. I'm full of anticipation to see how it progresses!
Posted: Sat 6. Jun 2015, 11:21
by Roy Partin
I appreciate it you guys. Taylor if its considered cheating then I'm a cheater on this. I viewed it as being similar to a TH knot. I just slowly started snugging each strand up until it was tight and eye appealing.
Posted: Sat 6. Jun 2015, 11:47
by Guest
Using tools effectively is what separates humans from other animals, so I guess it's a form of cheating
That's looking nice and tidy as expected. Did I understand correctly, are you leaving the handle as this 10-plait and starting the 14-plait overlay after it?
- Pokkis
Posted: Sat 6. Jun 2015, 11:57
by Roy Partin
That was the plan Pokkis. I had this crazy idea to try out but I'm not going to share it until I know that it works. We shall see.
Posted: Sat 6. Jun 2015, 12:31
by Guest
I know that will look cool. Did something like that on a small whip once, with same plait counts in fact, and liked it very much. Other than that, the design didn't most likely have anything in common with your crazy idea, as mine was plaited from the tip. If I ever do the same kind of whip for any heavy duty use, it will be done veeery differently.
Looking forward to seeing your crazy idea. Those are the best kind of ideas there are
- Pokkis
Posted: Sat 6. Jun 2015, 14:46
by Bobbi Holyoak
Its looking great!
Posted: Sat 6. Jun 2015, 17:41
by Taylor Jennings
Cheaters R Us....a podcast with Roy and Taylor. I thought same thing Roy. I hope eventually to not need to "cheat" but for now the fid is a way to make final product cleaner. As I figure things out, and develop my plaiting level of tightness, I'll fall back to the toolsi am comfortable with. Needles and fids. But no etape.