Page 1 of 1
More pictures of my whips
Posted: Wed 26. Jul 2017, 19:02
by Ethan Mitchell
Hey Guys,
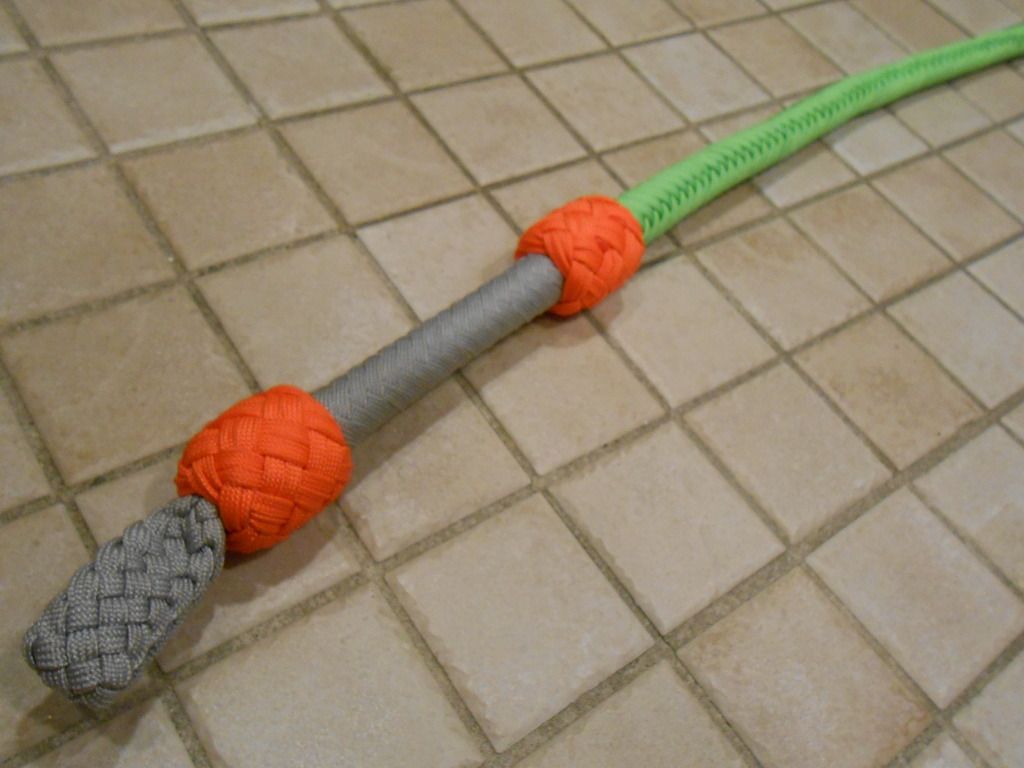
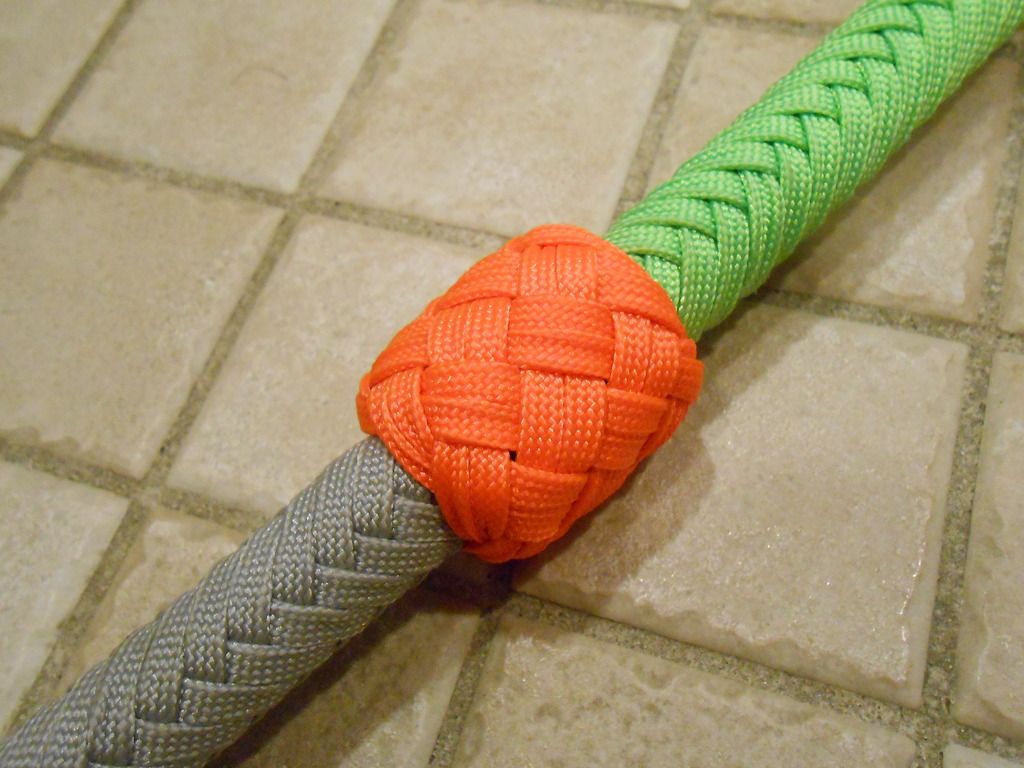
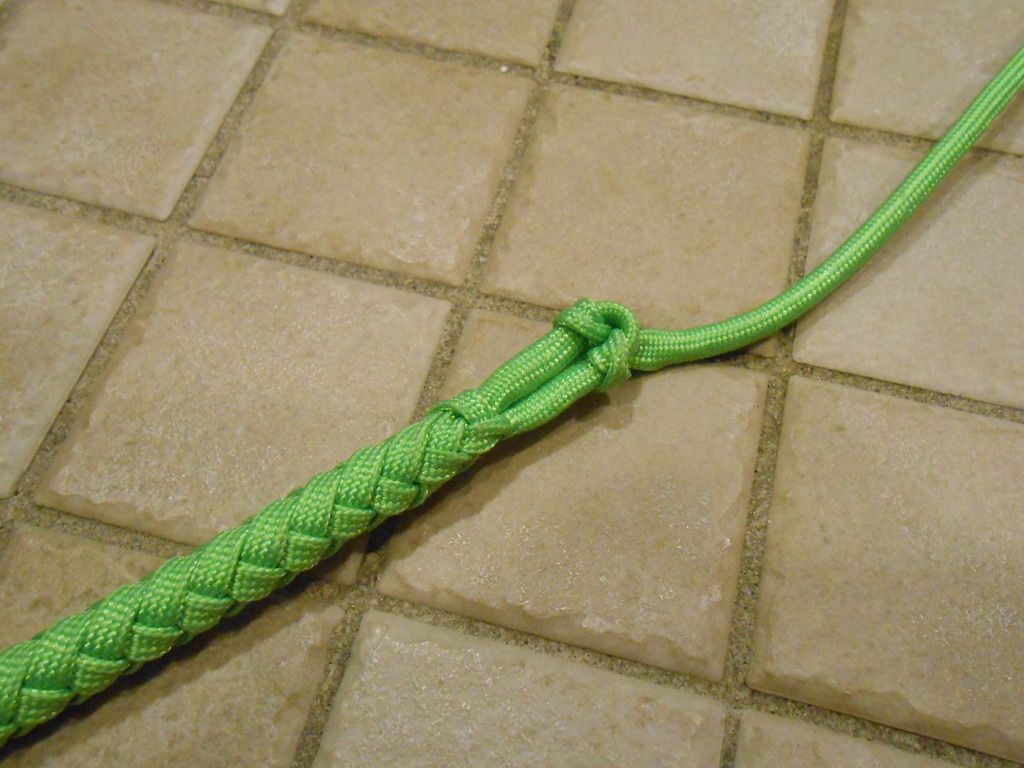
Here are a few pictures of the whips I have made so far:
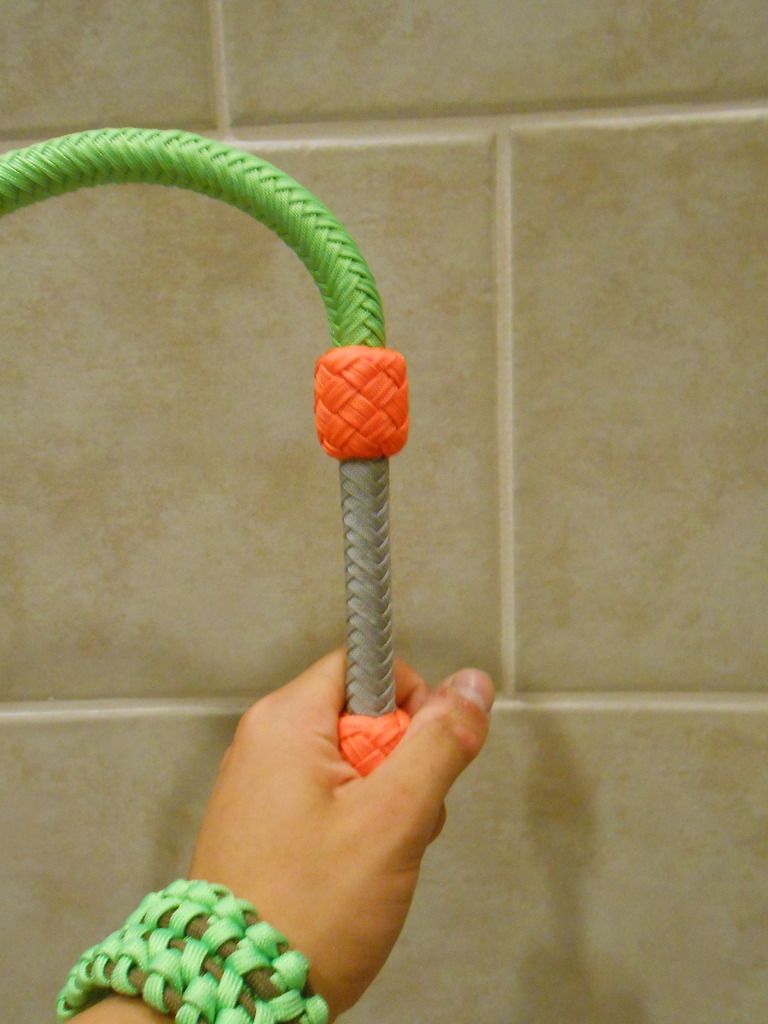
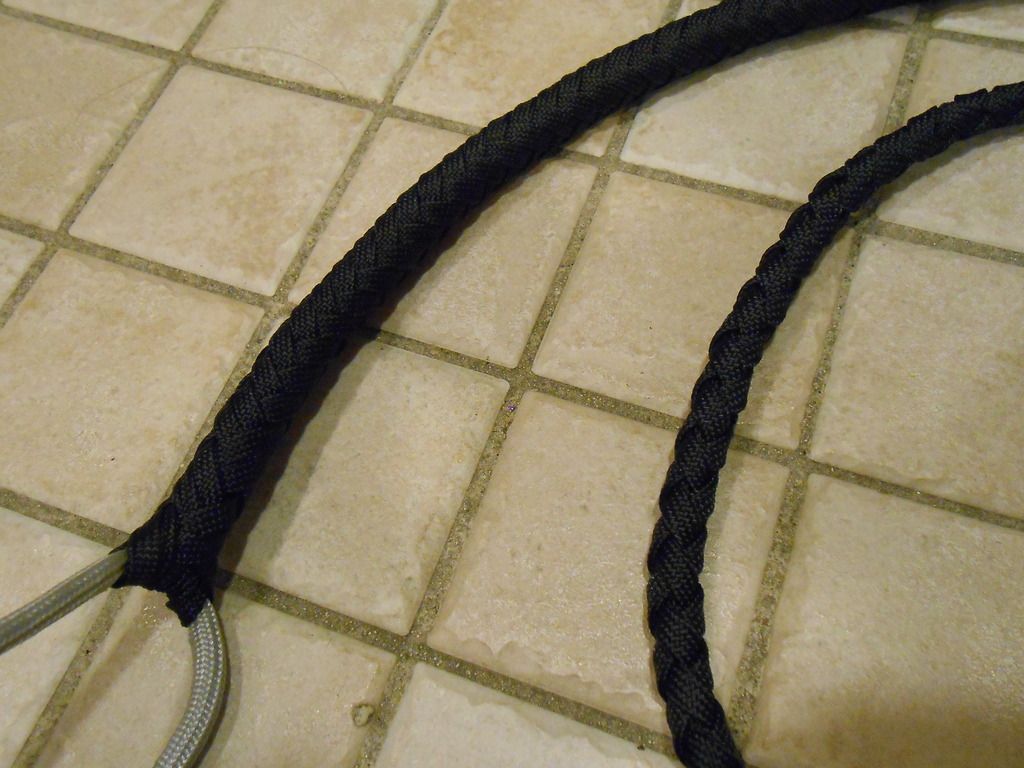
My first attempt at binding.

I did not add the last strand quite right so had to snip and singe

I carried the BB load all the way to the tip.
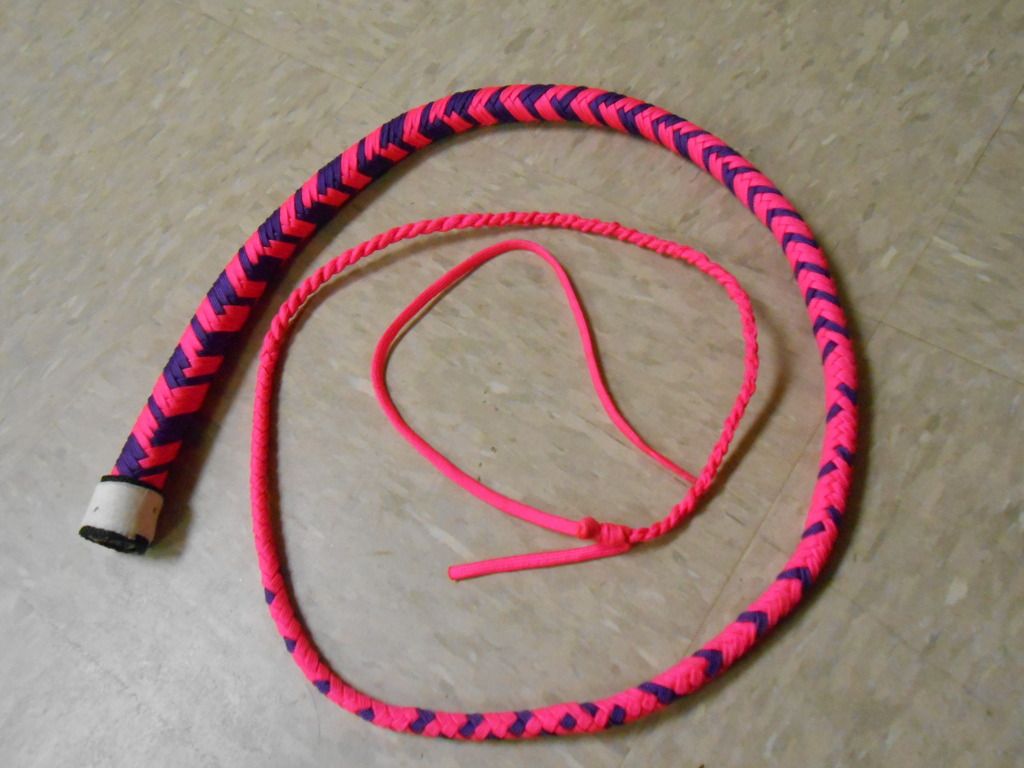
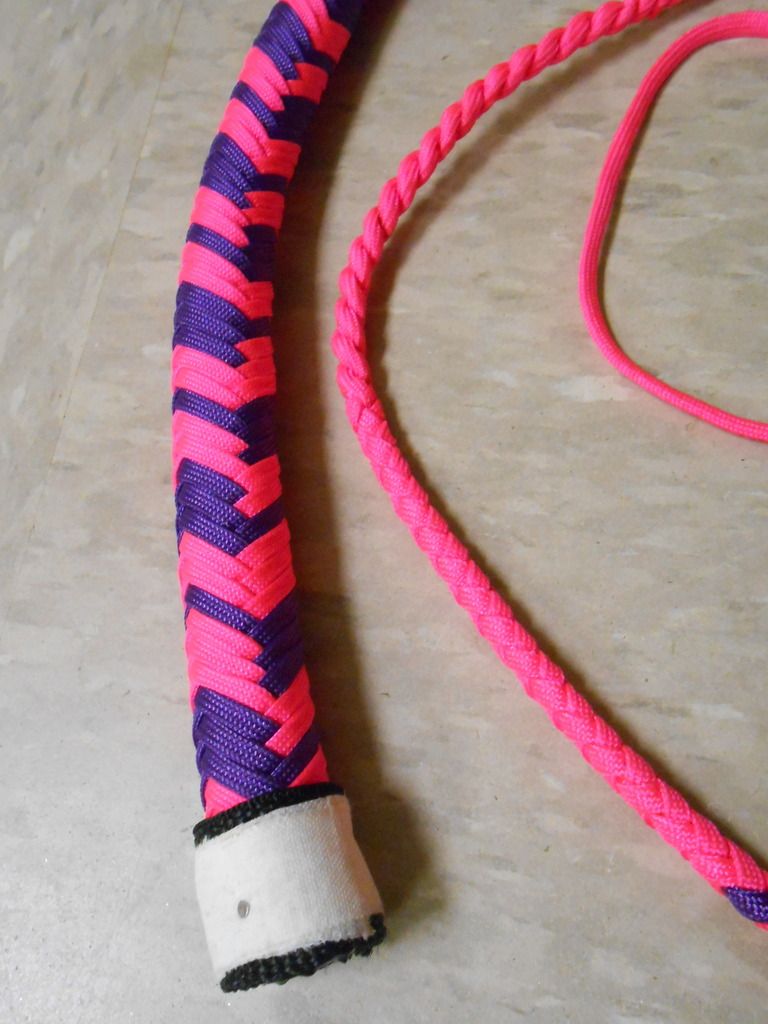
This one is the first and the last bellie for a pipe whip. I had trouble with the start splaying out. I used a twisted taper core. But I do not know how to fix it.
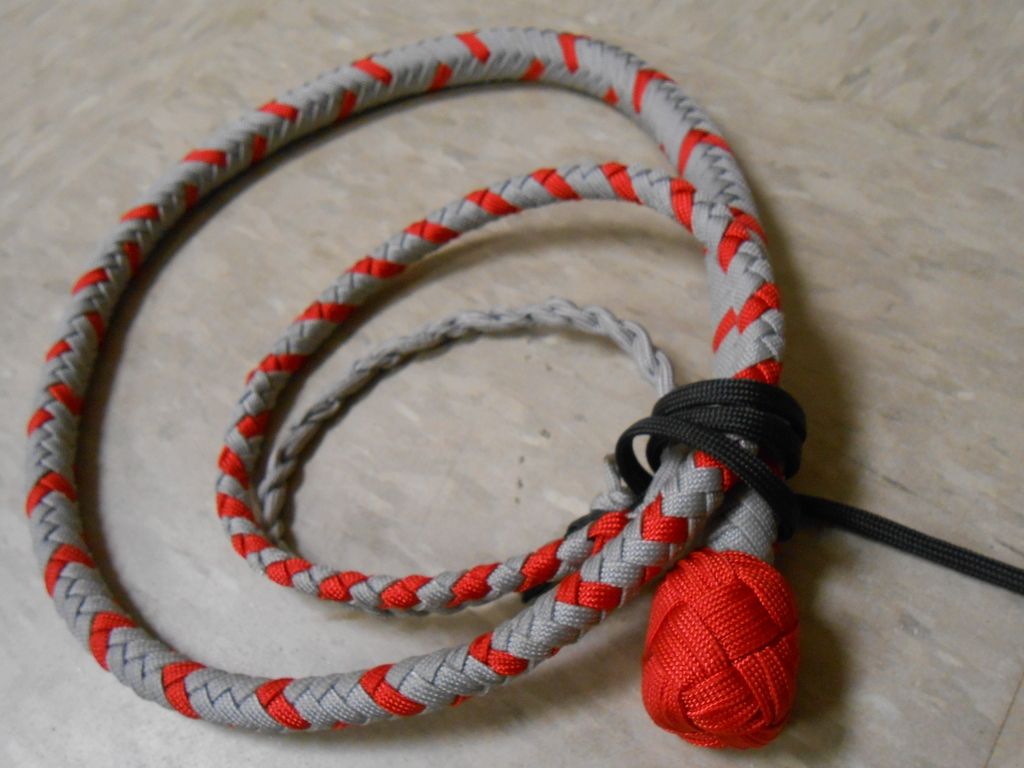
And was originally going to be a pipe whip, but I started it way wrong. So, since it has a great transition I am going to make it into a snakewhip.
Posted: Wed 26. Jul 2017, 21:19
by Sven van Leeuwen
Thanks for sharing. I must say, the plaiting looks very good already.
I like the colors of the grey/red whip. The knot look good. I can see some minor gaps, but if you make the foundation a bit smaller those would disappear. But they're minor.
Nice work.
Sven
Posted: Wed 26. Jul 2017, 21:49
by Matt Henderson
They're looking very good Ethan. As we've established, your knots are great!
Posted: Wed 26. Jul 2017, 21:52
by Ron May
Not too shabby.
If you line up your seams, for example on the green, grey, orange whip it won't seem so obvious, unless you wanted to do it that way, to show plaiting from the tip vs. from the heel for the handle.
Nice English eye.
Ron
Posted: Thu 27. Jul 2017, 13:51
by Ben Varsek
Ethan, your first attempt on binding is looking good already, but I would recommend to bind a bit more on your upcoming projects.
About finishing the twisted taper - there are several methods - the first step of all of these methods is the same: once you've reached the point when you want the twisted section to end you attach one of the strands to a lacing needle and feed it into the other strand (kind of like making a "normal paracrod fall"). Just make sure to pinch the end of the twisted section with either your fingers or a hemostat before feeding one strand into the other. Then you'll have several options:
1. You can cut and burn both ends (just like on a normal paracrod fall)
2. You can use a slitbraid to establish a secure connection between those last two strands.
3. You can sew those stands together.
I personaly prefer one of the last two options or both since they are more solid.
Rolling the twisted portion will also help to smooth it out and to even out the tension.
All the best
Ben
Posted: Thu 27. Jul 2017, 20:30
by Ethan Mitchell
Sven,
Thanks, I find making the foundations the right size for the knot the hardest part.
Thanks Matt!
Ron,
I did not even think about it as far as lining up my handle plaiting with the thong. But I'll keep that in mind for the next time.
Ben,
I bound it the way Nick Schrader does it. But as I did not use a vice I was not able to get it very tight.
Sorry, I was in a hurry to post the pictures. I think you may have misunderstood me. What I meant was how to start the bellies on a pipe whip/cow whip thong so they do not splay out like in the picture.
Right now I am just doing a overhand knot at the end of the twisted taper and attaching the fall like Rett does on his cow whips.
Thanks anyway!
Posted: Thu 27. Jul 2017, 21:53
by Jyri Haveri
Those looks good Ethan! Green, gray orange whip looks really good and your knots looks neat!
I am struggling with knot foundation sizes too.
Posted: Thu 27. Jul 2017, 22:13
by Ethan Mitchell
Thanks Jyri!
Posted: Thu 27. Jul 2017, 22:52
by Ethan Mitchell
I am working on a pipe whip, just finished the binding. Using the rolling on method. I just rolled it so it is a little bit smoother than in the pictures.


Sorry it is so fuzzy, I could not get my camera to focus.

I am definitely going to ditch Photobucket now that I've figured out how to use Imgur. It is so much cleaner, without all the popups.
Posted: Thu 27. Jul 2017, 23:00
by Ron May
Ethan, that looks like a good start.
The binding is right on.
Ron
Posted: Thu 27. Jul 2017, 23:30
by Ethan Mitchell
Thanks Ron!
Posted: Thu 27. Jul 2017, 23:50
by Rachel McCollough
Looking good!
Posted: Fri 28. Jul 2017, 00:00
by Ethan Mitchell
Thanks!
Posted: Sun 30. Jul 2017, 11:28
by Ben Varsek
Ethan, you don't need to apologize - I was the one who misunderstood your post!
In order to prevent the start of a pipe whip splaying out there are several methods.
One would be to use the square start method on each layer:
https://www.youtube.com/watch?v=0vIcD8bEX58
Another method would be to just start paliting over both keeper strands:
https://www.youtube.com/watch?v=fOgL9R2yWWk
(if you pause this video at 0:52 you'll see that the diameter of the start is even smaller than the "thickest" part of the thong)
I would also recommend to use epoxy glue to attatch the thong to the handle. Securing the thong to the handle with nothing but the keeper strands so that it won't move into any direction is very, very had to do (using epoxy glue on top of tying the keeper strands will eliminate this problem).
All the best
Ben
Posted: Mon 31. Jul 2017, 18:22
by Ethan Mitchell
Ben,
Thanks I think I'll try using the square start for the overlay.


